第2.1.3章 hadoop之eclipse远程调试hadoop
本文共 3182 字,大约阅读时间需要 10 分钟。
1 eclipse配置
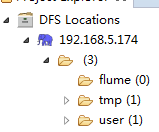
下载插件,将放到eclipse的plugins目录或者dropins下,重启eclipse 选择Window->Show View->Other->MapReduce Tools->Map/Reduce Locations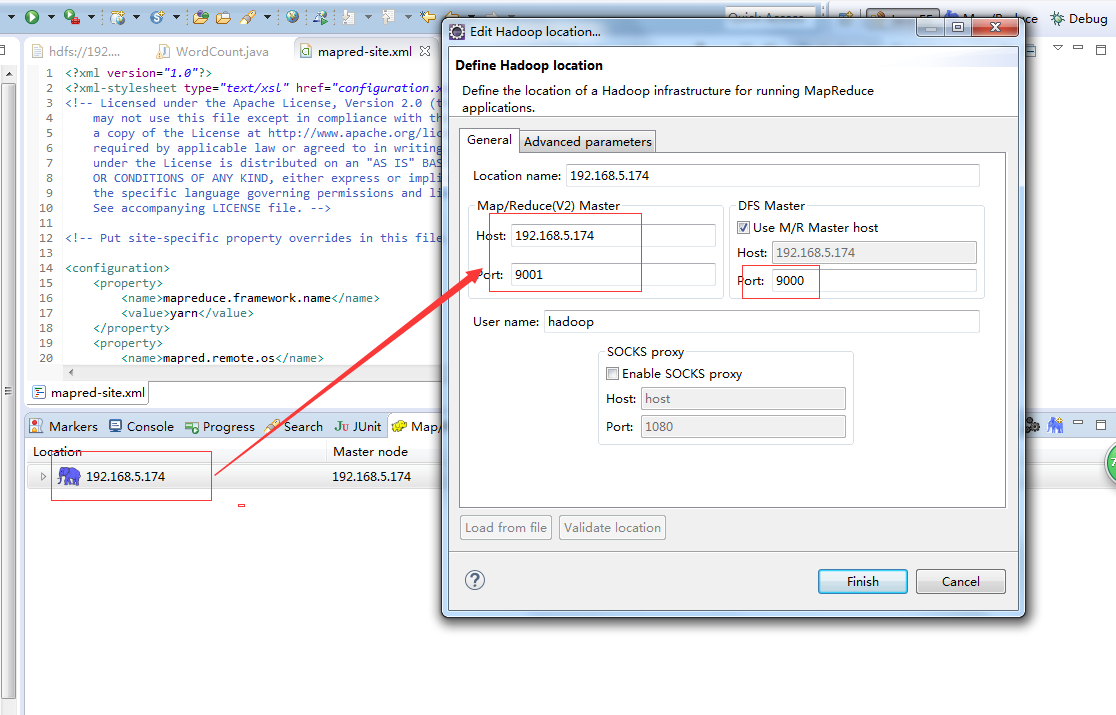 配置好后,eclipse可以连接到远程的DFS
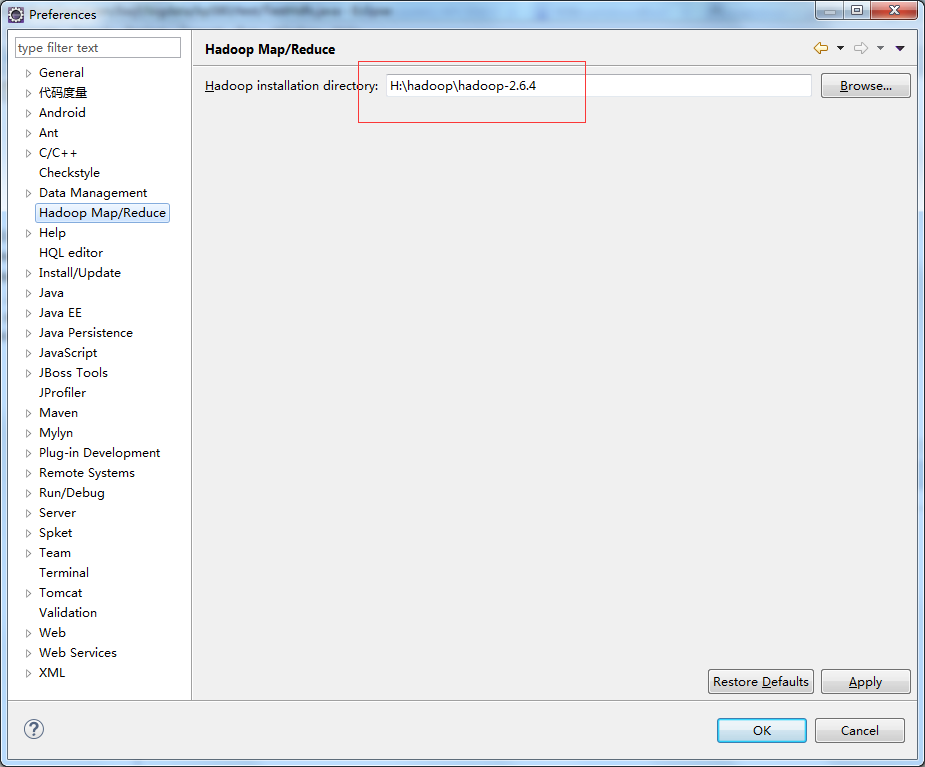
  2 windows配置 选择Window->Prefrences->Hadoop Map/Reduce,配置本地的hadoop,但是本地hadoop默认即可,不需要调整。
  配置环境变量
将winutils.exe复制到本地hadoop的$HADOOP_HOME\bin目录
将hadoop.dll复制到%windir%\System32目录 winutils.exe和hadoop.dll的获取,您可以从csdn上下载,也可以自行在hadoop-common-project\hadoop-common\src\main\winutils编译那个.net工程 环境变量配置
 3 wordcount示例的运行 创建maven工程,不赘述,在pom.xml中引入hadoop的jar。
 2.6.4 org.apache.hadoop hadoop-common ${ hadoop.version} org.apache.hadoop hadoop-hdfs ${ hadoop.version} org.apache.hadoop hadoop-client ${ hadoop.version}
将core-site.xml、hdfs-site.xml、mapred-site.xml、yarn-site.xml拷贝到src/main/resources
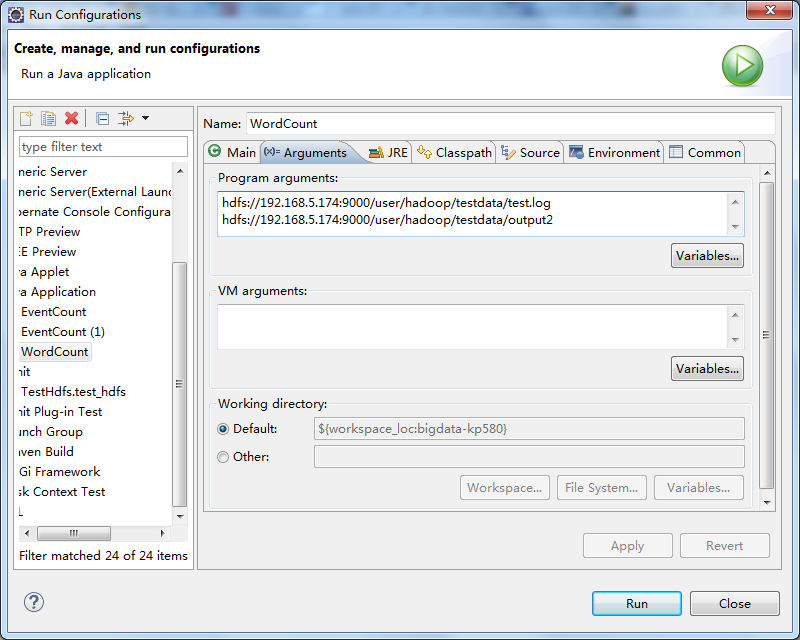
将源码中的WordCount导入到工程中,编译Export出jar到其他的文件夹中,为方便测试命名为testWordCount.jar 然后修改工程的main代码,添加下图红色部分内容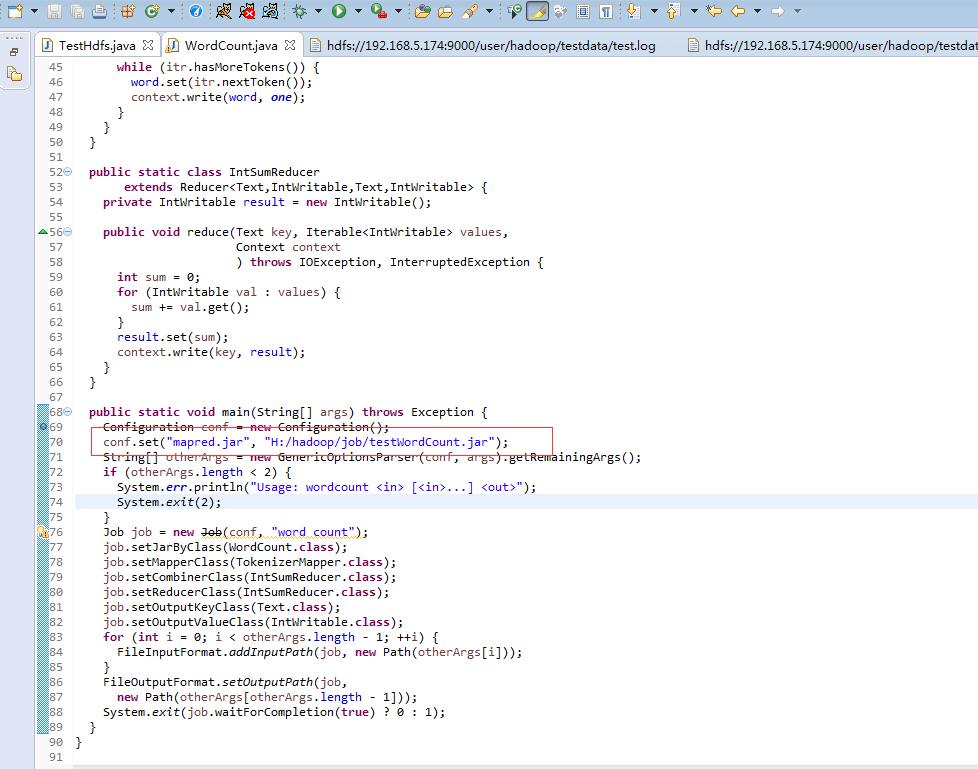 配置Run Configurations,在Arguments中添加参数 第一行hdfs://192.168.5.174:9000/user/hadoop/testdata/test.log是输入文件 第二行hdfs://192.168.5.174:9000/user/hadoop/testdata/output2是输出目录
  test.log的内容可通过以下代码写入
 import java.io.BufferedReader;import java.io.File;import java.io.FileInputStream;import java.io.FileNotFoundException;import java.io.IOException;import java.io.InputStream;import java.io.InputStreamReader;import java.io.UnsupportedEncodingException;import java.net.URI;import org.apache.hadoop.conf.Configuration;import org.apache.hadoop.fs.FSDataOutputStream;import org.apache.hadoop.fs.FileStatus;import org.apache.hadoop.fs.FileSystem;import org.apache.hadoop.fs.Path;import org.apache.hadoop.io.IOUtils;import org.junit.Test;public class TestHdfs { @Test public void test_hdfs(){ String uri = "hdfs://192.168.5.174:9000/"; Configuration config = new Configuration(); try { FileSystem fs = FileSystem.get(URI.create(uri), config); // FileStatus[] statuses = fs.listStatus(new Path("/user/hadoop/testdata")); for (FileStatus status:statuses){ System.out.println(status); } // FSDataOutputStream os = fs.create(new Path("/user/hadoop/testdata/test.log")); os.write(readFile()); os.flush(); os.close(); // InputStream is = fs.open(new Path("/user/hadoop/testdata/test.log")); IOUtils.copyBytes(is, System.out, 1024, true); } catch (IOException e) { e.printStackTrace(); } } private byte[] readFile(){ File file = new File("F:/阿里云/174/hadoop-hadoop-namenode-dashuju174.log"); StringBuffer text = new StringBuffer(); try { InputStreamReader read = new InputStreamReader(new FileInputStream(file),"UTF-8"); String lineTxt = null; BufferedReader bufferedReader = new BufferedReader(read); while((lineTxt = bufferedReader.readLine()) != null){ text.append(lineTxt).append("\n"); } read.close(); } catch (UnsupportedEncodingException | FileNotFoundException e) { e.printStackTrace(); } catch (IOException e) { // TODO Auto-generated catch block e.printStackTrace(); } return text.toString().getBytes(); }} 运行后结果

你可能感兴趣的文章
Nodejs中的fs模块的使用
查看>>
NodeJS使用淘宝npm镜像站的各种姿势
查看>>
NodeJs入门知识
查看>>
nodejs包管理工具对比:npm、Yarn、cnpm、npx
查看>>
NodeJs单元测试之 API性能测试
查看>>
nodejs图片转换字节保存
查看>>
nodejs在Liunx上的部署生产方式-PM2
查看>>
nodejs基于art-template模板引擎生成
查看>>
nodejs字符与字节之间的转换
查看>>
NodeJs学习笔记001--npm换源
查看>>
NodeJs学习笔记002--npm常用命令详解
查看>>
nodejs学习笔记一——nodejs安装
查看>>
vue3+Element-plus icon图标无法显示的问题(已解决)
查看>>
NodeJS实现跨域的方法( 4种 )
查看>>
nodejs封装http请求
查看>>
nodejs常用组件
查看>>
nodejs开发公众号报错 40164,白名单配置找不到,竟然是这个原因
查看>>
Nodejs异步回调的处理方法总结
查看>>
NodeJS报错 Fatal error: ENOSPC: System limit for number of file watchers reached, watch ‘...path...‘
查看>>
nodejs支持ssi实现include shtml页面
查看>>